The CoolAutomation ToolBox - Or Setup Utility - is an executable file that runs on Windows Operating Systems.
It allows you to connect to your CoolAutomation devices via a USB Cable or over the local network and perform configuration changes to them.
Step 1:
Download the CoolAutomation ToolBox
- After the installation there will be 2 new icons on your desktop - SetupUtility, and Firmware update Utility.
Step 2:
Follow this short video on how to use it
Step 3:
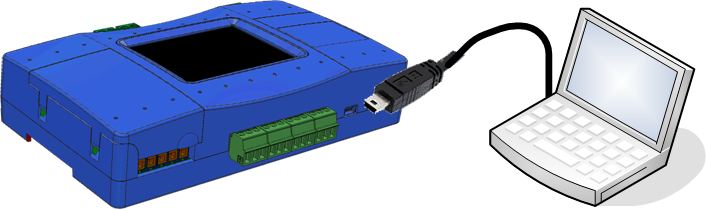
Connect your Cool Device’s USB port to your PC using the supplied USB cable - on CoolMaster the port is at the top of the device, on CooLinkHub it is on the back of the device. If this is your first connection, the USB driver (COM) will automatically be installed.
OR
For IP connection - After running the program choose "Connection" > "Network" from the menu and connect using the device IP address.
Step 4:
Run the CoolAutomation ToolBox on your PC
When connecting to your device with the SetUp Utility, the first tab you see is the Network Settings tab.
On the network tab, you can determine different network configurations:
- Whether the IP will be Dynamic Host Configuration Protocol (DHCP) or Static.
- For static IP enter the IP , netmask and gateway addresses. This usually needs to be coordinated with the site IT team or internet service provider.
The second tab on the Setup Utility is HVAC lines.
On this tab you can configure which brand is connected to each line on the CoolMaster.
On the right side you will receive the required dip switch state for the line type - manually set accordingly.
The third tab on the Setup Utility is the Terminal tab.
To find out about the different possible terminal commands please refer to this article.
On the Tools tab you can find additional important functionalities, such as: Firmware update, KNX setup and VA Setup, etc.
Here you can update the firmware of your device:
First, make sure your bootloader is up-to-date:
For CoolMaster family: Boot loader update file - Can be done via an IP connection on the FW update utility.
For CooLinkHub & CooLinkBridge please contact customer support.
Please use the following image files by device type to do so:
CoolMaster family (CoolMaster, CoolMasterNet, CoolMasterPro)
This is relevant for CooLinkHub & CooLinkBridge and old versions of the CoolMaster.
CoolMaster family devices are compatible with ETS and don't require this tool.
Here you can define the group for each function.
This setup is used to create and edit virtual addresses for the use of Bacnet and Modbus communication.
In order to assign VA click "Auto":
You should then receive a list of VA per unit ID:
If you already have VA addresses assigned and you wish to add more, this can be done here:
In order to delete one or more virtual addresses, first select them, and then click "Remove":
In order to clear the virtual address list, click "Remove All":
To save the list to a text file, click "Save":
To load a saved test file with the current address list, click "Load":
After each of these changes click "Apply" to load the changes to the device.
The inspector is checking the network functionality of the device.
Result should be "PASSED".
With this tool you can capture and save an image of your device current screen.
Click anywhere on the "Click to Capture" screen.
You will receive the image - you can then save it to your computer.